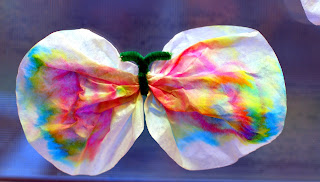
Start out by ripping a whole bunch of little pieces of tissue paper. They can be any size or shape, doesn't matter. You can mix up the colors however you please. I suggest that instead of buying it, you should pull out that stash of tissue paper you've collected at birthdays and Christmas.

Now, get out your contact paper. For those who don't know about contact paper, its great! Basically, its clear shelving paper that is sticky on one side and can be used for crafts, laminating, or lining shelves. There are so many projects you can do with it (don't worry, I will be posting more). You can find it with the shelving paper at your local grocery store. So, back to the project: cut a square about 5x5 out of the contact paper.
Peel the paper off the contact paper, and place it on the table sticky side up. Have your child stick the pieces of tissue paper all over the contact paper. The can overlap, there can be spaces uncovered, the whole sheet can be covered, it doesn't matter.
When they are finished, take another piece of 5x5 contact paper and peel the paper off. Stick it on top of the first sheet of paper so that the tissue paper part is sandwiched in the middle.
Now, grab some scissors and cut a shape into the contact paper sandwich. I like eggs and hearts because they are simple. If you want to do something more difficult and can't free-hand it, you can print a template online and use it as a guide. We decided to do an Easter bunny since Easter is this weekend and my son has Easter bunnies on the brain. You can do different shapes for each of the holidays.
To finish it off, cut a hole in your design and put a piece of ribbon through it to hang it from the window.
As I said, this project is so easy, but the kids will love it. My photos don't do them justice, but they really do turn out cute.


.JPG)


